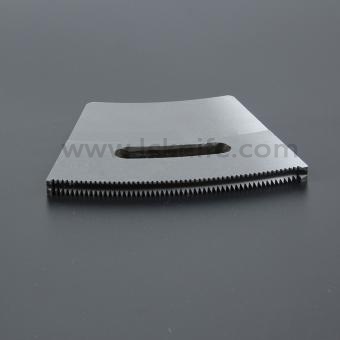
Standardisiertes Installationsverfahren für Doppelachsige Häckslermesser :
1. Sicherheitsvorkehrungen
Vor Beginn die Stromzufuhr unterbrechen und das Gerät verriegeln. Schnittfeste Handschuhe und Schutzbrille anziehen. Benötigtes Werkzeug bereithalten: verstellbare Schraubenschlüssel, Dickenmessgeräte und Gummihämmer. Sägeblattstange und Umgebung reinigen.
2. Installationsprotokoll
Prüfen Sie die Ersatzklingen auf Beschädigungen der Schneidkanten. Vergewissern Sie sich, dass alle Positionierungsstifte, Befestigungsschrauben und Gewinde der Welle keine Verformungen oder Abnutzungsspuren aufweisen.
Positionieren Sie die Klingen gemäß der Anleitung. Klemmen Sie die Klingen fest auf die Wellen und richten Sie sie mit einem gleichmäßigen Zahn- und Nutmuster aus.
Die Schrauben gleichmäßig über Kreuz mit dem vorgeschriebenen Drehmoment (üblicherweise 80–120 N·m) anziehen.
Messen Sie den Spalt mit einer Dickenlehre: Wählen Sie 0,2–0,3 mm für harte und 0,1–0,2 mm für weiche Materialien. Achten Sie darauf, dass der Spalt konstant bleibt; korrigieren Sie ihn, falls er 0,05 mm überschreitet.
Drehen Sie beide Stangen mindestens einmal von Hand. Die Klingen müssen sich leichtgängig und leise bewegen – sie dürfen niemals klemmen, kratzen oder Widerstand leisten – bevor Sie fortfahren.
3. Betriebliche Validierung und Inbetriebnahme
Lassen Sie die Maschine drei Minuten lang ohne Last mit ihrer üblichen Drehzahl laufen. Achten Sie auf einen ruhigen Lauf: Es dürfen keine Vibrationen, laute Schleifgeräusche oder ungewöhnliche Bewegungen auftreten. Schneiden Sie anschließend unter sorgfältiger Beobachtung eine Materialprobe. Prüfen Sie, ob die Abmessungen der fertigen Teile den Vorgaben entsprechen (z. B. muss der Durchmesser D90 kleiner oder gleich dem Zielwert sein). Erst nach dieser Prüfung darf die Maschine für den regulären Betrieb freigegeben werden.
4. Wichtige Hinweise zu Sicherheit und Leistung
Halten Sie niemals behandschuhte Hände in die Nähe von rotierenden Bauteilen – auch nicht bei manueller Rotation.
Die Stromzufuhr muss unterbrochen bleiben, bis alle Befestigungselemente vollständig angezogen sind und das endgültige Spiel überprüft wurde.
Ist der Spalt nicht korrekt, verschleißen die Klingen schneller, werden zu heiß, schneiden schlecht oder verursachen Verstopfungen im Materialvorschub.
Ma'anshan Licheng Blade Manufactory


 IPv6-Netzwerk unterstützt
 Scan zu wechat: